

"I have never messed up while using git" - said no one, ever.
Git is something that if learned properly in beginning of your career as a software engineer, can serve you so well in the coming years!
Hey there 👋 I'm Rishav, and this is my new article series called "Bookmark Devouring🔖🥩" in which I will clear all my bookmarks on all platforms and in the process, learn new things and teach you too!
In this article, we will learn about the most popular "version control system" that is git. At the end of this article, you will have a solid understanding of how git works, the problems we might face, and how to fix those problems.
Let's eat a potato like Sasha and start!

Short Intro to Git 🖧
Git is a distributed version control system. Okay what? Let me break it down:
- distributed meaning all our code, including full history of changes is mirrored on each user's computer.
- version control system keeps track of the project files, history of changes, support for branching, merging and other things.
There is a different kind too, called Centralized VCS in which all code is stored on a server, and people (clients) pull code from server, make their changes, and then push changes directly to server. So there is no collaboration with other developers, and only connection is with the server.
We use git for project management and efficient, error free collaboration with other developers. Storing code change history and using features such as branching helps us for better collaboration, which is one of the most important aspects of programming.
Before getting into why is git needed, and the problems it solves, we need to understand some basic concepts about git.
Repository: A repository is the place where all your project files will be stored along with a .git folder containing all the stuff git records. We have local and remote repositories. Local ones are saved in our own system, whereas remote repositories are hosted online on platforms like Github, Gitlab, etc.
Commits: When you make changes into your code or add/delete files, you need to commit the changes to the branch you are in. You can think of this as saving your work in git history.
Branching and Merging: All work is done on branches. After you have just initialized your git repository, everything will be saved in the default Master Branch. If you want to work on some features and don't want to mess your main codebase, you create a branch. After working on the features ,when you want to add your changes to master branch, you merge the two branches.
Staging Area: Before commiting changes, we need to add it to the Staging area. This tells git to commit all those changes which are staged.
Why git?
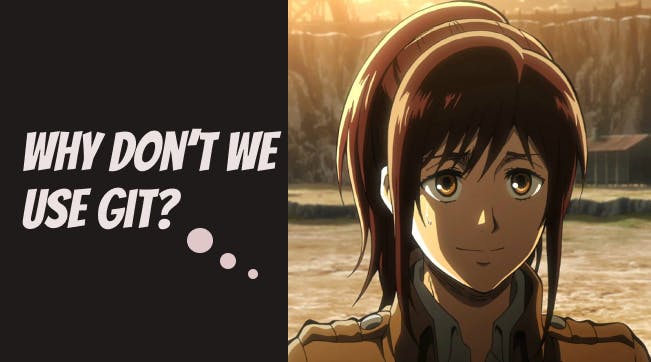
Git is cool but why do we need it? We will look into the story of Sasha, retired Survey Corps soldier transitioning into tech.

Sasha is a newbie developer and is assigned to a new project at work. It is an ongoing project so she takes all the project codebase and copies into her personal system and takes it home. She happily works on all the things she were assigned to, and later comes back with her copy of the project, which has changes of her own.
But there were other newbies too, and they were all assigned to this project and they had changes of their own. What a disaster! How do we solve this? Everybody has a different copy of the project, and all of those changes need to be done in the main project. Some changes might conflict with other changes, like the same file having different code from the actual onsite project, and some files might be deleted by the newbies which we don't really want.
Unlike all the other newbies, Sasha did some research, and found out about this open source tool called Git. She told all the other newbies that we can collaborate and merge our changes into the main project hassle free with Git. She gave some instructions to everyone on how to work with git.
Initial Steps
Sasha told everyone to go home and taught them some basic commands. But before that they needed to install Git. She gave them this link. After installing git, they were told to run:
git init
in their working directory. This will initialize a new git repository(aka directory aka folder), and from here git will start recording changes. Now what we need is get local copy of our main project, which is on a public remote repository(stored on Github). On the repo webpage of this remote repo(we'll call it repo instead of repository), we will see a link to clone their webpage:
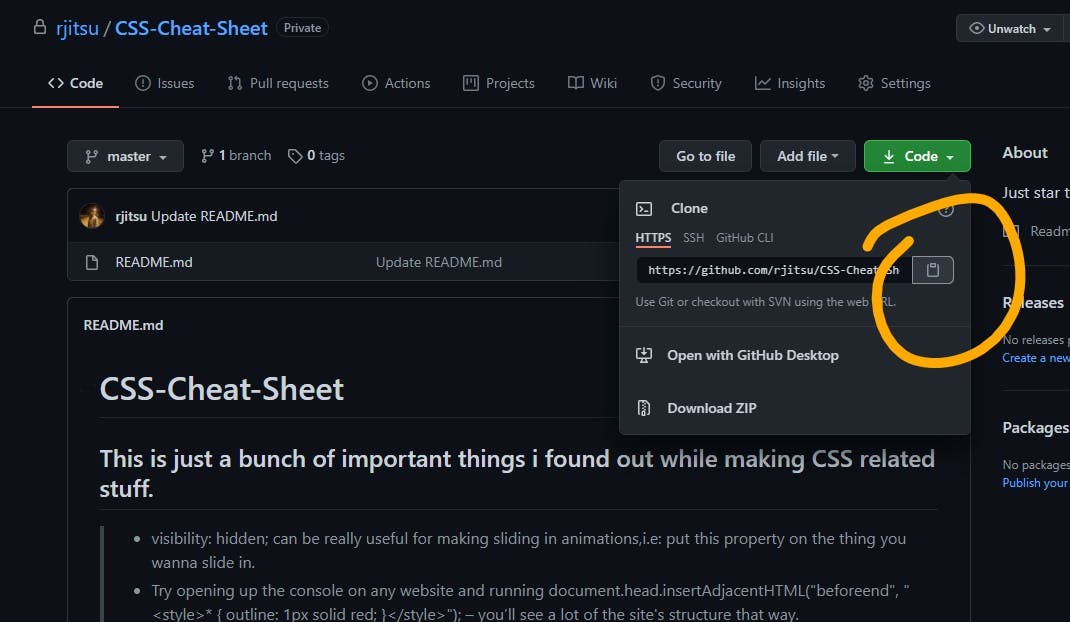
Copy this https url and run:
git clone https://github.com/rjitsu/CSS-Cheat-Sheet.git
This will clone( download ) the repo in our system. Now that everyone has the fresh copy of project, they can work on it as they want and make their changes.
"But how?" - asked one newbie to Sasha.
Branching and collaborating
Git has a feature called Branching for safe collaboration. When you create a git repo, and work on it without branching, by default all changes are done to Master branch. When you want to add a feature, or just work seperately so that if you mess up, the master branch will not be affected, you make a branch. You do it by:
git branch new-branch
This will create a new branch. To see all branches, you run:
git branch
This will list all repositories. But git branch new-branch does not switch to the newly made branch, it just makes it. So to switch to it we use:
git checkout new-branch
Okay. Now we have a new branch. We make our changes to the code. Now we want to stage them and commit them. To stage all files we run:
git add .
The " . " is depicting we need to stage all files to the staging area. If you just need to stage some particular files, you do git add following the filenames. To commit files and finally save them in our history we run:
git commit -m "add all files"
The -m flag is for adding a commit message which is followed by the message itself. If you omit the -m flag, git commit will open a text editor to add the commit message.
You can watch all commits done on the branch you are on by :
git log
Hot Tip 🔥: use
git log --decorate --oneline --graph --allto see a cleaner and prettier git log output
Now we will push our code to our branch by:
git push
Now, you need to merge your branch to the master. Before that, you checkout to the master branch.
git checkout master
After that run:
git merge new-branch
This will create a merge commit in git history, and will merge your branch into the master, meaning all your changes including history of changes is added to the master branch.
Hooray! Your branch is merged with the master branch. But all these changes are on our local repository with no connection to our main project which is hosted on a remote repository online on Github 😱.
Sasha says "Don't worry people, we will add a origin to our local repo and this will connect it to the remote repo."
git remote add origin https://github.com/rjitsu/CSS-Cheat-Sheet.git
Now push all your changes by:
git push origin master
This will push all the changes from your local master branch to the origin. Phew!
Sasha explained all this to the newbies, and therefore they could all work hassle free on their local branches via git!
If you read through all that, congratulations to you🎉.
To recap, we learned about:
- what git is, the important terms related to it.
- how to initialize, add, commit and push to branches.
- how to merge branches.
- a git workflow describing a real life situation of Sasha👧
Thanks for reading. If you liked this article, be sure to check my other ones too! For further reading, read the docs on Atlassian.